 Log in



Making a tray of gummies in your kitchen is a weekend project. Making ten thousand consistent, shelf-stable, professional-quality gummies a week is a production system — and the difference between the two is not a bigger pot. It's formulation discipline, process control, and equipment chosen for throughput instead of charm.
This guide covers the full journey from confident home batches to commercial-grade production: the formula changes that matter at scale, the equipment ladder from countertop to depositor, step-by-step process instructions, quality control, packaging, and the troubleshooting knowledge that saves entire production days. If you haven't yet mastered small batches, start with our gummies-from-scratch guide and come back — this article assumes you can already make a good gummy and want to make thousands of them.
Table of Contents
- Home Batches vs. Commercial Production: What Actually Changes
- The Master Formula and How to Scale It
- Ingredient Sourcing at Scale
- Equipment: The Three-Stage Ladder
- The Commercial Process, Step by Step
- A Worked Example: The 5 kg Pilot Batch
- Costing, Yield, and Pricing
- Flavor and Color Systems That Stay Consistent
- Curing, Drying, and Shelf Stability
- Packaging and Labeling Basics
- Troubleshooting Guide
- FAQ
Home Batches vs. Commercial Production: What Actually Changes
A home gummy batch forgives you. If one tray sets a little soft, you eat it anyway. At commercial scale, three things stop being optional.
Consistency becomes the product. A customer who loved last month's peach gummies expects this month's to be identical — same chew, same color, same flavor intensity. That means every input gets measured by weight, every temperature gets logged, and "a splash" and "a pinch" disappear from your vocabulary permanently.
Water becomes the enemy. Moisture content determines texture, shelf life, and whether your gummies weld themselves into a single mega-gummy inside the bag. Commercial producers think constantly about water activity — how much free moisture is available in the finished piece — because it controls both mold risk and texture drift.
Time becomes money. Depositing 200 gummies with a squeeze bottle is charming once. At scale, filling speed, mold capacity, and curing space set your production ceiling, and every process choice gets evaluated against pieces-per-hour.
The good news: none of this requires a factory on day one. There's a well-worn ladder from kitchen to commercial kitchen to co-packer, and each rung is profitable if you climb it deliberately. Our small candy business guide covers the business side; this guide covers the production side.
The Master Formula and How to Scale It
Almost every commercial gelatin gummy is a variation on the same skeleton, expressed in baker's-style percentages of total batch weight:
- Sweeteners (sugar + glucose syrup): roughly 55–70% of the batch, typically split between granulated sugar and glucose (corn) syrup. The glucose fraction controls crystallization and chew.
- Water: 15–25% at mixing time — much of it leaves during cooking and curing.
- Gelatin: 6–10% depending on target chew. More gelatin means a firmer, bouncier bite and better heat resistance.
- Acid (citric or a buffered blend): 0.5–1.5%, added late, both for tartness and to lower pH.
- Flavor: a concentrated food flavor compatible with your formula, typically used at a low percentage. Follow the product guidance, run a bench trial, and record the accepted dose by batch weight before scaling.
- Color: drops, not percentages — dosed to visual target and recorded by weight once you find it.
The single most important scaling rule: scale by weight ratio, never by volume, and never linearly assume process times. A 10× batch does not cook in 10× the time — it cooks in whatever time your equipment takes to bring 10× the mass to temperature, which you must measure and log. The formula scales linearly; the process does not.
Write your master formula as percentages, then generate batch sheets for each size you run (say, 5 kg, 15 kg, 40 kg). Every production run gets a printed batch sheet with actual weighed amounts, operator initials, and temperature checkpoints. This one habit is most of what "commercial-grade" means.
Ingredient Sourcing at Scale
Gelatin is your structural ingredient and the one to standardize first. Bloom strength — the industry measure of gel firmness — changes texture dramatically, so switching suppliers mid-production is asking for a texture complaint. Our 275-bloom Type A pork skin gelatin comes in 250 g bags for development work and 1 kg bags for production, and staying on a single consistent bloom means your formula behaves the same way every run.

Flavors must be selected for compatibility with the formula and process. Because gummy mass may still be warm at addition, validate flavor performance in a cured pilot rather than assuming every extract or oil behaves the same way. Explore concentrated options in the gummy flavoring collection. Moving from 2 oz development bottles to 8 oz, 32 oz, or gallon sizes keeps your per-piece flavor cost dropping as you grow — we ran the numbers in our cost-per-batch breakdown.
Acid and sour systems deserve care: raw citric acid added too early or too heavily attacks gelatin and weakens set. A buffered approach like Citrus Flavor Intensifier — used in place of the citric acid in your formula — delivers tartness with less risk to structure.
Colors are covered in their own section below, and the rest of your consumables (molds, release agents, packaging) live in the gummy ingredients collection.
Equipment: The Three-Stage Ladder
Stage 1: Advanced Kitchen (up to ~2,000 pieces/day)
- Digital scale accurate to 1 g (plus a 0.01 g scale for flavors and colors)
- Heavy-bottomed pot or double boiler, and an accurate digital thermometer
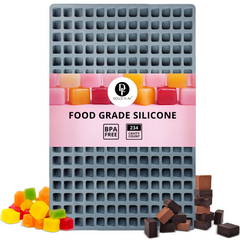
- High-count silicone molds — this is the stage's real bottleneck, solved cheaply: a 230-cavity square mold or 234-cavity cube mold lets one pour set an entire batch, and a few of them let batches leapfrog each other
- Spouted pitchers or squeeze bottles for depositing
- Wire racks and a low-humidity space for curing
Stage 2: Commercial Kitchen (2,000–20,000 pieces/day)
- Water-jacketed or induction kettle (20–60 L) for even, scorch-free heating
- Manual or pneumatic benchtop depositor — the single biggest speed upgrade you'll ever buy; a funnel-style depositor fills hundreds of cavities per minute
- Mold racks and a dedicated curing room or cabinet with dehumidifier and fan
- Refractometer for measuring soluble solids (°Brix) — this replaces guesswork about doneness
- pH strips or meter for your acid additions
Stage 3: True Commercial (20,000+ pieces/day)
- Cooker with vacuum or continuous cooking capability
- Automated depositor line, often with starch or silicone mold boards
- Conditioning/curing rooms with controlled temperature and humidity
- Sealing and packaging equipment (VFFS machines, band sealers)
- At this stage, many brands weigh co-packing versus owning the line — a business decision as much as a production one
Move up a stage when demand — not ambition — forces it. Equipment you're not saturating is capital sitting idle.
The Commercial Process, Step by Step
Step 1: Weigh Everything First
Mise en place is a food-safety and consistency practice, not a cooking-show flourish. Every ingredient weighed, every weight checked against the batch sheet, initials on paper. Flavor and color pre-measured into small cups so nothing gets added twice or forgotten.
Step 2: Bloom the Gelatin
Combine gelatin with its measured cold water and let it hydrate fully — 10 to 15 minutes until uniformly swollen with no dry cores. Rushed blooming is the root cause of an astonishing number of grainy, weak-set batches.
Step 3: Cook the Sweetener Syrup
Heat sugar, glucose syrup, and water to a full dissolve, then cook toward your target solids. At Stage 1 you'll judge by temperature; from Stage 2 onward, check with a refractometer — commercial gummies typically deposit somewhere in the 75–80 °Brix range depending on formula. Log the number every batch.
Step 4: Marry Syrup and Gelatin
Cool the syrup to the temperature specified by your validated formula before adding the bloomed gelatin, then stir gently until fully dissolved. Prolonged heat exposure—especially in an acidic system—can weaken gelatin, while aggressive agitation can introduce surface foam. Skim any foam now — at scale, a few minutes of resting time lets most bubbles rise.
Step 5: Add Acid, Flavor, and Color — Late and Off the Heat
With the mass off direct heat, add your acid solution, flavor, and color, in that order, stirring just enough to make each uniform. Late addition protects flavor volatiles from cooking off, keeps color true, and minimizes the time acid spends attacking gelatin at high temperature.
Step 6: Deposit
Keep the mass warm and fluid (a water bath works at small scale; jacketed hoppers at larger scale) and fill your molds in a steady, continuous motion. High-count molds mean one uninterrupted pour per batch. Tap or lightly vibrate molds to release trapped air.
Step 7: Set, Demold, and Cure
Initial set happens in 30–60 minutes at cool room temperature — resist refrigeration, which causes condensation. Demold onto racks, then cure: 24–72 hours of open-air drying at low humidity, turning once, until the surface is dry to the touch and the chew has firmed to target. Curing is where texture and shelf life are actually made; it is the least skippable step in this entire guide.
Step 8: Finish and Record
Sanding (sugar or sour coating), oiling for shine and release, or leaving pieces clean-faced all happen post-cure. Weigh finished yield, record it on the batch sheet, and pull retention samples — a few pieces from every batch, labeled and dated, so any future complaint can be checked against the actual product.
A Worked Example: The 5 kg Pilot Batch
Percentages are abstract until you cook with them, so here is what a 5 kg pilot batch — the standard size for validating a formula before scaling — looks like in practice, using the middle of each range from the master formula.
- Granulated sugar: 1,900 g
- Glucose syrup: 1,350 g
- Water (syrup): 700 g
- Gelatin (275 bloom): 400 g
- Water (gelatin bloom): 600 g
- Buffered acid solution: 45 g, added late
- Flavor oil: weighed to your spec — for a first pilot, begin at the low end of the dose range and record exactly what you used
- Natural color: counted in drops, then weighed and recorded
Run the batch exactly as the step-by-step process describes, and treat the pilot as a data-gathering exercise, not a production run. You're recording four numbers: the time your equipment took to reach cook temperature, the °Brix (or temperature) at deposit, total deposit time, and finished cured yield by weight.
That last number matters more than beginners expect. A 5 kg wet batch does not produce 5 kg of sellable gummies — moisture leaves during cooking and curing, foam gets skimmed, the kettle keeps a film, and depositing always leaves a remnant. Most operations land somewhere between 85% and 92% sellable yield once cured. Whatever your number is, it becomes a line on the batch sheet, because a sudden yield drop is often the first visible symptom of a process problem — an overcook, a depositing issue, or a curing room running too dry.
At 4 ml per cavity, a 5 kg batch fills a 230-cavity mold roughly sixteen times over — which is exactly why the pilot stage is also where most makers conclude that mold capacity, not batch size, is their real constraint, and add molds or move toward a depositor.
Repeat the pilot three times before you scale. If all three batch sheets agree — same yield, same texture, same deposit window — your formula is ready to grow. If they don't, the disagreement will point you straight at the variable you're not yet controlling.
Costing, Yield, and Pricing
Commercial production only earns the name if you know your cost per piece. The arithmetic is simple; the discipline is doing it with real numbers from your own batch sheets instead of optimistic estimates.
Start with ingredient cost per batch: sum what you actually paid for the sugar, glucose, gelatin, acid, flavor, and color in one batch. Divide by cured sellable pieces — not theoretical pieces — to get ingredient cost per gummy. For most gelatin gummy formulas the striking discovery is how little of that cost is flavoring: a concentrated flavor oil dosed at a fraction of a percent contributes pennies per hundred pieces, and stepping up from 2 oz to 32 oz or gallon bottles drops it further. We walked through this math in detail in the cost-per-batch analysis; the short version is that flavor quality is the cheapest premium you can add to your product.
Then add the costs beginners forget: packaging (often rivaling ingredients per unit), labor at an honest hourly rate, curing space and utilities, and a spoilage allowance for failed or out-of-spec batches. A common small-brand outcome is a fully loaded cost of a few cents per piece, wholesaling at 40–50% of retail, with bagged retail prices set by your local market. Run the numbers before committing to wholesale accounts — wholesale is where under-costed products quietly lose money on every order.
Finally, protect margin with yield discipline: every point of yield you recover through better depositing, foam control, and curing-room management is pure profit on production you've already paid for.
Flavor and Color Systems That Stay Consistent
At scale, "what flavor should this batch be?" becomes a specification, not a vibe. Build a flavor spec sheet per SKU: flavor oil, dose by weight per kg of batch, acid level, and color formula. Oil-soluble or water-soluble flavors may work depending on the formula, carrier system, and supplier guidance. Validate compatibility, flavor retention, and appearance in a cured pilot — dosing guidance and pairing ideas live in our gummy flavoring guide.
For color, the clean-label direction is clear: more buyers every year read ingredient panels and prefer plant-based colors. The workhorses for gummies come from the natural food coloring collection: Natural Red (beet extract) for reds and pinks, Natural Blue (spirulina) for blues, and Natural Super Red when you need a deeper, bolder red than standard beet color reaches. These are water-soluble liquids that disperse cleanly in the gummy mass when added at the late-addition stage.
Two commercial habits improve color consistency: record the dose by weight whenever your scale permits, and evaluate a set, cured piece under standardized lighting. Natural colors can shift with pH, heat, light, and storage, so run stability checks before approving a commercial specification. Our natural coloring shade guide maps specific shade targets to specific drop counts.
Curing, Drying, and Shelf Stability
Freshly demolded gummies are overhydrated. Curing removes surface and near-surface moisture until the piece reaches its equilibrium texture — typically a 24–72 hour process at roughly 50–60% relative humidity with gentle air movement. Under-cured gummies feel great on day one and then sweat, stick, and mold in the bag. Over-cured gummies toughen and shrink.
From Stage 2 onward, buy a hygrometer for the curing space and log conditions like you log cook temperatures. If you're producing seasonally — say, building Halloween inventory through late summer, as we recommend in the Halloween production timeline — curing capacity, not cooking capacity, is usually the constraint that determines how early you need to start.
A note on sugar-free lines: gummies sweetened with sugar alcohols and fiber syrups cure and behave differently (they're generally more hygroscopic, meaning they pull moisture from the air). If a keto SKU is in your roadmap, develop it as its own formula from the start — our sugar-free keto gummy guide is the right foundation.
Packaging and Labeling Basics
Package only fully cured pieces, ideally with a light food-grade oil polish or sanding to prevent sticking. Heat-sealed bags with low oxygen and moisture transmission protect texture; clear windows sell the product but accelerate color fading in direct light, so keep displayed inventory rotating.
Labeling requirements vary by where and how you sell — cottage food rules, state registrations, and FDA labeling requirements for ingredient statements and allergens all come into play as you grow (pork gelatin, for instance, matters to many buyers and should be clearly disclosed). Build your label checklist early with your local requirements in hand; the business-formation side is covered in our candy business guide.
Troubleshooting Guide
Gummies won't set, or set soft
Check several variables before changing the formula: gelatin bloom and hydration, gelatin concentration, acid level and timing, actual process temperatures, final solids, and weighing accuracy. Prolonged heating—particularly after acidification—can weaken gelatin. Compare the batch record with an accepted control and change one variable at a time.
Grainy or gritty texture
Graininess can come from incomplete gelatin hydration or from sugar crystallization caused by solids balance, agitation, seeding, cooling conditions, or ingredient variation. Note when the defect first appears, compare against a control batch, and adjust only after identifying the likely cause.
Cloudy gummies with surface foam
Air is often introduced during mixing or depositing. Stir gently, allow the mass to rest if the process window permits, skim foam, and use food-production equipment designed for controlled warming or deaeration. Avoid open-flame shortcuts around molds, packaging, or concentrated flavorings.
Gummies sweat or turn sticky in the bag
Under-curing or humid packaging conditions. Extend cure time, verify curing-room humidity, and never bag pieces that feel tacky. If your climate is humid, a dehumidified packing area pays for itself in saved product.
Mold growth
Discard affected product and investigate sanitation, formulation, processing, packaging, and storage. Appearance alone cannot establish safety. A commercial formula needs validated controls—including appropriate pH and water-activity targets where applicable—plus microbial and shelf-life testing performed with qualified food-safety support.
Flavor fades between production and sale
Flavor added while the mass was too hot, or dosing too low for a long shelf life. Add flavor as late as your process allows and taste-test a cured, week-old retention sample — not the fresh batch — when setting dose levels.
Color looks different batch to batch
Color dosed by eye instead of by weight/drops, or evaluated on liquid instead of cured pieces. Fix the spec sheet and the problem disappears.
Pieces tear or stick when demolding
Demolded too early or a damaged mold surface. Give initial set the full time, and retire molds with scratched cavities to development duty.
FAQ
What bloom strength gelatin should I use for commercial gummies?
Bloom strength is one part of texture design; gelatin concentration, sugar and acid balance, water, and processing matter too. Our gelatin is 275 bloom, a useful starting point for a firm gummy, but changing bloom strength or supplier requires a new pilot and validation.
How many gummies can I realistically make without machinery?
With a couple of 230-cavity molds, batch-staggering, and a helper, a disciplined two-person kitchen operation can produce a few thousand pieces per day. Beyond that, a benchtop depositor is the next bottleneck-breaker, not a bigger pot.
Should I use oil-soluble or water-soluble flavoring in gummies?
Either oil-soluble or water-soluble flavoring may be appropriate depending on the formula, carrier system, and product directions. Start with supplier guidance, test a small pilot, and set the final dose from cured retention samples—not from the warm mass alone.
How long do commercial gummies last?
There is no universal shelf life for a commercial gummy. It must be established for the specific formula, process, packaging, and storage conditions using documented water-activity/pH controls where applicable, microbial assessment, and real-time or appropriately designed shelf-life testing.
Can I use natural food coloring at commercial scale?
Yes, but natural colors can respond differently to pH, heat, light, oxygen, and storage. Follow the color supplier's guidance, dose by a repeatable measured specification, and approve the shade only after testing it in the finished gummy over the intended shelf life.