 Log in



Fudge and caramels are where candy making gets serious — and seriously rewarding. They're the two confections people happily pay $18 a pound for at tourist-town candy shops, yet both come from the same short list of pantry ingredients: sugar, butter, cream, and heat.
The difference between "grainy disappointment" and "better than the shop on the boardwalk" comes down to technique, temperature, and a handful of tricks that nobody puts on the recipe card. This guide covers all of it: the science, the equipment, step-by-step methods for classic fudge and soft caramels, flavor variations, and what to do when a batch misbehaves — whether you're making holiday gifts or building inventory for a small candy business.
Table of Contents
- The Science: One Syrup, Two Candies
- Equipment You'll Need
- Ingredients That Matter
- Classic Chocolate Fudge, Step by Step
- The Quick Fudge Shortcut
- Flavor Variations for Fudge
- Soft Caramels, Step by Step
- Flavor Variations for Caramels
- Level Up: Chocolate-Dipped Caramels & Turtles
- Cutting, Wrapping & Storing
- Scaling Up: Fudge & Caramels as a Business
- Troubleshooting Guide
- FAQ
The Science: One Syrup, Two Candies
Fudge and caramel start almost identically — sugar and dairy cooked into a concentrated syrup — and then take opposite paths. Understanding that fork in the road is the single most useful thing you can learn as a candy maker.
Fudge is controlled crystallization
Fudge gets its dense, melt-away texture from millions of microscopic sugar crystals. The entire method is engineered to make those crystals form at the right moment and stay tiny. You cook the syrup to soft-ball stage (234–237°F), let it cool undisturbed to about 110°F, and only then beat it. Beat too early, while it's hot, and large crystals form — that's the grainy fudge everyone has had at a bad bake sale.
Caramel is prevented crystallization
Caramel wants the opposite: no crystals at all, just a smooth, glassy-chewy mass. That's why caramel recipes lean on corn syrup, an "interfering agent" whose glucose molecules physically get in the way of sucrose crystal formation. Cook the syrup to firm-ball stage (245–248°F), pour, cool, and never beat it.
Meanwhile, the browned, toasty depth of caramel comes from Maillard reactions between milk proteins and sugar during the long cook — flavor you literally cannot buy in a bag of candy melts.
Same ingredients, two different textures, all controlled by temperature and agitation. Once that clicks, both recipes stop feeling like luck. (If you enjoy this kind of kitchen science, our gummies-from-scratch guide and ice cream guide apply the same thinking to other confections.)
Equipment You'll Need
Neither candy needs specialty machinery, but a few tools are non-negotiable:
- Heavy-bottomed saucepan (3–4 quart). Thin pans create hot spots that scorch dairy. Go bigger than you think — caramel foams up dramatically.
- Candy thermometer. The difference between soft caramels and jawbreakers is about 10 degrees. A clip-on analog or a digital probe both work; test yours in boiling water (it should read 212°F at sea level).
- Wooden spoon or heat-proof silicone spatula. For stirring early in the cook and beating fudge later.
- 8×8 or 9×9 pan lined with parchment (leave overhang handles), or silicone molds for pre-portioned pieces. The 230-cavity square molds turn caramel into perfectly uniform squares with zero knife work.
- Pastry brush and a cup of water. For washing stray sugar crystals off the pan walls during the cook — the pro habit that prevents chain-reaction graininess.
- Bench scraper or heavy chef's knife, lightly oiled, for cutting.
- Wax paper or cellophane squares if you're wrapping caramels.
At altitude? Subtract about 2°F from every target temperature for each 1,000 feet above sea level — water boils cooler up there, and the standard numbers assume sea level.
Ingredients That Matter
Sugar. Plain granulated white sugar for both. Brown sugar can substitute for part of it in caramels for extra molasses depth.
Dairy. Fudge uses whole milk or evaporated milk plus butter; caramels demand heavy cream. Low-fat substitutions are the top cause of scorched, broken batches — the fat is structural.
Corn syrup. A small amount in fudge is insurance against premature crystallization; a substantial amount in caramel, where it's essential. Light corn syrup is the standard.
Chocolate. For chocolate fudge, use real chocolate or cocoa. Better chocolate genuinely shows through — this is not the place for the dusty baking bar from three holidays ago.
Salt. Both candies are sweet enough to need it. Flaky sea salt on top of caramels is arguably the single highest-return upgrade in candy making.
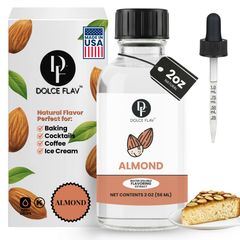
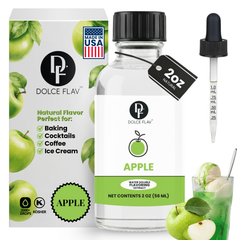
Flavoring. Concentrated flavorings are the difference between "homemade fudge" and a signature product line. Fudge, being chocolate- and fat-based, takes oil-soluble flavor oils beautifully. Caramels — a dairy emulsion finished off the heat — are traditionally flavored with water-soluble extracts stirred in at the end. We'll cover specific combinations in the variation sections below.
Classic Chocolate Fudge, Step by Step
This is true old-fashioned fudge — the cooked, beaten kind with the fine-crystal snap that no condensed-milk shortcut can replicate. Yield: about 36 pieces from an 8×8 pan.
Ingredients
- 3 cups granulated sugar
- ⅔ cup unsweetened cocoa powder
- 1 tablespoon light corn syrup
- 1½ cups whole milk
- ¼ teaspoon salt
- 4 tablespoons butter, cut in pieces
- 1 teaspoon vanilla (or see flavor variations)
Method
Step 1 — Combine and dissolve. Whisk sugar, cocoa, and salt in your heavy saucepan. Stir in milk and corn syrup. Cook over medium heat, stirring gently, just until the sugar dissolves and the mixture reaches a boil.
Step 2 — Cook without stirring. Once boiling, stop stirring entirely. Clip on the thermometer and let it climb to 234–237°F (soft-ball stage). Wash down any crystals on the pan wall with a wet pastry brush. This takes patience — often 15–25 minutes.
Step 3 — Cool undisturbed. Off the heat, drop the butter on top — don't stir — and let the pot sit until it cools to about 110°F (roughly an hour). This is the step impatient cooks skip, and it's the step that decides the texture.
Step 4 — Add flavor, then beat. Add your vanilla or flavoring now, then beat with a wooden spoon. For 5–15 minutes the mixture will be glossy and fluid; keep going. The moment it thickens noticeably and loses its shine, you've hit controlled crystallization.
Step 5 — Pan immediately. Scrape fast into your lined pan and smooth the top — it sets quickly from here. Cool completely at room temperature before cutting into squares.
The Quick Fudge Shortcut
For gift batches and market-day volume, there's no shame in the two-ingredient method: melt 3 cups of chocolate chips with one 14 oz can of sweetened condensed milk over low heat, stir until smooth, flavor, and press into a pan to set.
It won't have the crystalline texture of cooked fudge — it's technically a ganache — but it's fast, nearly foolproof, and an outstanding flavor canvas. Because the base is chocolate and fat, oil-soluble flavors stir straight in: start with ⅛ teaspoon, taste, adjust. It's also the ideal test bed before committing a flavor idea to a full cooked batch.
Flavor Variations for Fudge

Fudge is chocolate- and fat-based, which makes it natural territory for oil-soluble flavor oils — the same ones used for chocolate work in our chocolate pairing guide. Add them at the same point as vanilla: after cooling, before beating (or straight into quick fudge). Start with ⅛–¼ teaspoon per batch, taste, and adjust — concentrated oils are far stronger than grocery-store extracts.
Peppermint fudge. The holiday classic, and the first one to sell out at winter markets. Oil-soluble peppermint plus a crushed-candy-cane topping. This one flies as soon as December hits.
Orange chocolate fudge. A few drops of orange flavor oil turns dark chocolate fudge into a chocolate-orange truffle experience.
Cinnamon fudge. Cinnamon flavor oil adds bakery warmth — dial it in carefully, since cinnamon is assertive. More ideas in our cinnamon oil guide.
Banana fudge. Unexpected and addictive: banana flavor oil in milk-chocolate quick fudge, topped with walnuts.
Raspberry dark chocolate. Raspberry flavor oil against a dark cocoa base — the flavor pairing that makes people close their eyes.
A note on white and vanilla fudge bases
Swap the cocoa for white chocolate (in the quick-fudge method) and you get a pale canvas that shows off brighter flavors: lemon, orange creamsicle, or strawberry all read beautifully against a white base. Because white fudge is still a fat-based candy, stick to oil-soluble flavor oils here too, and resist the urge to tint it with water-based coloring — in a chocolate-heavy base, water-based liquids cause seizing. If you want colored confections, that's a job for gummies, frosting, or marshmallow instead.
How to dose like a professional
Whatever the flavor, the professional habit is the same: measure, record, taste, adjust. Add ⅛ teaspoon, stir fully, and taste a cooled dab — hot candy always tastes weaker than it will once set, so if the flavor seems perfect while warm, it may be too strong tomorrow. Write down exactly what the batch got. Two months from now, when a customer asks for "that orange one from last time," your notebook is the product.
Soft Caramels, Step by Step
These are chewy, wrap-in-wax-paper caramels — deeply flavored from real Maillard browning. Yield: about 60 small squares.
Ingredients
- 2 cups heavy cream
- 2 cups granulated sugar
- ¾ cup light corn syrup
- 6 tablespoons butter
- ½ teaspoon fine salt (plus flaky salt for topping)
- 1 teaspoon vanilla or other extract (see variations)
Method
Step 1 — Warm the cream. Heat cream and butter together in a small pot until the butter melts; keep warm. Adding warm dairy later prevents the temperature crash that stalls a cook.
Step 2 — Build the syrup. In your big heavy pot, combine sugar, corn syrup, and ¼ cup water. Cook over medium-high, without stirring, until it turns a light amber — around 320°F.
Step 3 — Add cream carefully. Off the heat, pour in the warm cream mixture in a slow stream, whisking. It will bubble up furiously — this is why you used the big pot.
Step 4 — Cook to firm-ball. Return to medium heat and cook, stirring occasionally now (the corn syrup has crystallization handled), until the thermometer reads 245–248°F. 245°F gives a softer chew; 248°F a firmer candy that ships better.
Step 5 — Flavor and pour. Off the heat, stir in salt and your extract — off-heat matters, since flavor volatiles evaporate at a boil. Pour into a parchment-lined pan or lightly greased silicone molds. Top with flaky salt once it stops flowing.
Step 6 — Cool fully. Give it 4+ hours (or overnight) at room temperature before cutting with an oiled knife.
Flavor Variations for Caramels
Caramel is a dairy-based candy finished off the heat, which makes water-soluble extracts the traditional route — they stir smoothly into the hot emulsion in the final step. Start with ½–1 teaspoon per batch and adjust next time; the caramel's own flavor is strong, so you're layering, not replacing.
Vanilla bean standard. Vanilla extract is the baseline for a reason — it amplifies the dairy sweetness that makes caramel taste expensive.
Maple caramels. Maple extract gives you maple candy flavor without the erratic behavior of real syrup in a sugar cook. A natural fall bestseller — see our maple recipe roundup for companion bakes.
Butterscotch caramels. Doubling down with butterscotch extract plus a brown-sugar substitution makes an intensely nostalgic candy.
Rum caramels. A splash of rum flavoring makes a sophisticated adult caramel with zero alcohol in the finished candy.
Salted hazelnut. Hazelnut extract plus flaky salt — praline energy, no nut allergy handling required until you choose to add toasted nuts on top.
Level Up: Chocolate-Dipped Caramels & Turtles
Once your plain caramels are consistent, dipping them in chocolate roughly doubles what customers will pay for them — and opens the door to the most beloved candy-counter item of all: the turtle.
Tempering, briefly
For dipped caramels that snap and stay glossy at room temperature, the chocolate needs to be tempered. The simplest home method is seeding: melt two-thirds of your chopped chocolate to about 115°F, remove from heat, stir in the reserved third until the mixture cools to roughly 88–90°F (dark chocolate), and it's ready to use. Skip tempering and the coating will still taste fine but may bloom gray and stay soft — acceptable for home treats, not for products you sell.
One warning worth repeating from our chocolate flavoring guide: keep every drop of water away from melting chocolate, and only ever flavor it with oil-soluble flavor oils. Water-based liquids — including water-soluble extracts and colorings — will seize the batch into a grainy paste.
Dipping method
Chill your cut caramels for 15 minutes so they hold shape, then drop one at a time into the tempered chocolate, lift with a fork, tap off the excess on the bowl's edge, and set on parchment. Top with flaky salt before the chocolate sets. Work in rhythm: chill, dip, tap, set — a batch of 60 goes faster than you'd think once you find the cadence.
Turtles
Arrange clusters of toasted pecans on parchment, spoon warm (not hot) caramel over the center of each cluster, cool, then cap with tempered chocolate. If your caramel is too hot it flows off the nuts; too cool and it won't stick. Aim for the honey-like stage as it cools — usually 10–15 minutes after the pour. A drop of rum flavoring or maple extract in the caramel step makes a turtle nobody else at the market is selling.
Cutting, Wrapping & Storing
Cut fudge with a long knife wiped clean between cuts; cut caramel with an oiled knife or bench scraper, or skip cutting entirely by setting caramel in square silicone molds.

Wrap caramels individually in wax paper twists — unwrapped, they slowly slump into one communal caramel. Fudge stores airtight at room temperature for 1–2 weeks, or freezes for 3 months. Caramels keep 2–3 weeks at cool room temperature; refrigeration makes them tough to bite until they warm back up.
Humidity is the enemy of both. On sticky days, run the batch in the morning, and get finished candy into airtight containers as soon as it's fully cool.
Scaling Up: Fudge & Caramels as a Business
Fudge and caramels are two of the best margin products in small-batch confectionery: cheap ingredients, no cold chain, long shelf life, and a "handmade" halo that supports premium pricing.
Standardize with a log. Record exact temperatures, timings, weather, and flavor dosing for every batch. Consistency — not creativity — is what wholesale accounts pay for.
Scale smart. Double batches work; beyond that, cook multiple pots rather than one giant one. Bigger volumes change heating dynamics, and a scorched 4x batch hurts.
Cost your flavors properly. Concentrated flavorings in larger formats (8 oz to gallon) bring flavor cost per piece down to fractions of a cent while giving you a signature line — a "flavor flight" of five fudges outsells plain chocolate at any craft fair. Our farmers market playbook covers pricing and display; our candy flavoring oils overview helps you pick a starting lineup.
Mind the rules. Most U.S. states cover fudge and caramels under cottage food laws, but licensing, labeling, and sales-channel limits vary — check your state's requirements before your first sale.
Plan a seasonal calendar. Fudge and caramel are gift candies, which means demand is lumpy: back-to-school markets warm up in September, then October through December is the sprint. Lock your holiday flavor lineup by early fall, order flavorings and packaging before the rush, and treat January as your R&D month. Pumpkin-adjacent flavors like pumpkin spice earn their keep from September to Thanksgiving, then peppermint takes over — the same seasonal wave we map out in our pumpkin spice guide.
Packaging sells the second piece. A caramel in a twisted wax wrapper reads "handmade" in a way a bare square never will. Boxes of 6 and 12 with a flavor card outperform bulk bags at retail price points, and a mixed "sampler" is your gateway product for new customers.
Troubleshooting Guide
Grainy fudge. It was beaten too hot, or stray crystals seeded the batch mid-cook. Next time: don't stir after boiling, wash down the pan walls, and wait for 110°F before beating. Rescue: add ½ cup milk, re-dissolve over low heat, and re-cook the batch properly.
Fudge won't set. Undercooked — it never reached soft-ball stage. Re-cook to 234–237°F. Verify your thermometer in boiling water first; a thermometer that reads 5°F high will sabotage every batch.
Fudge set like a brick. Overcooked past 240°F, or beaten far too long. Crumble it over ice cream (our ice cream flavoring post will take it from there) and adjust next round.
Caramel too soft or too hard. Pure temperature. Too soft = pull at 247–248°F next time; too hard = 244–245°F. Ambient humidity nudges results, so log the weather with each batch.
Caramel separated or oily. The emulsion broke, usually from cold cream hitting hot sugar or aggressive heat late in the cook. Warm the cream first, add it slowly, and whisk as you pour.
Scorched bottom. Thin pan or too-high heat once dairy was in. A heavy pot, moderate heat, and occasional stirring after the cream goes in are the fix.
Flavor faded to nothing. The flavoring went in while the syrup was still boiling, and the aromatics steamed off. Always flavor off the heat, at the end.
FAQ
What's the real difference between fudge and caramel?
Texture strategy. Fudge is cooked to soft-ball stage and beaten so it sets with millions of microscopic sugar crystals; caramel is cooked hotter with corn syrup to prevent crystals entirely, staying smooth and chewy. Same core ingredients, opposite techniques.
Do I really need a candy thermometer?
For consistent results, yes — the working range between "too soft" and "too hard" is about 5–10°F for both candies. The old cold-water ball test works in a pinch, but a $15 thermometer pays for itself in saved batches almost immediately.
Which flavorings work in fudge vs. caramels?
Fudge is chocolate- and fat-based, so oil-soluble flavor oils (peppermint, orange, cinnamon, raspberry) blend in perfectly. Caramels are traditionally finished off the heat with water-soluble extracts like vanilla, maple, or butterscotch. In both cases start small — ⅛–¼ teaspoon of concentrated oil per fudge batch, ½–1 teaspoon of extract per caramel batch — then taste and adjust.
Can I sell homemade fudge and caramels?
In most U.S. states, yes, under cottage food laws — both are shelf-stable, low-risk products. Rules on licensing, labels, and where you can sell differ by state, so verify locally before launching.