 Log in


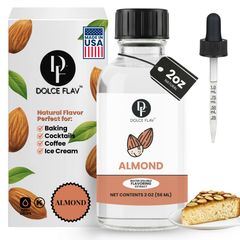
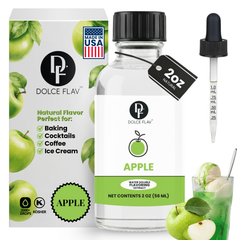

Homemade ice cream sits in a strange spot: everyone loves it, most people assume it's hard, and almost nobody realizes that the difference between grainy, icy disappointment and scoop-shop silk comes down to a handful of learnable techniques. This guide covers all of them — from your first no-churn batch to a commercial-grade workflow for anyone thinking about selling scoops.
Whether you own nothing but a freezer or you're pricing batch freezers for a small shop, by the end of this guide you'll know exactly how ice cream works and how to make it reliably, batch after batch.
Table of Contents
- The Science: What Ice Cream Actually Is
- Equipment: Home and Commercial
- The Three Base Styles
- Step-by-Step: Classic Custard Ice Cream
- Step-by-Step: No-Churn Ice Cream
- Step-by-Step: Philadelphia-Style Ice Cream
- Flavoring Ice Cream Like a Professional
- Six Signature Flavors to Build First
- Coloring Ice Cream Naturally
- Scaling Up: Commercial-Grade Production
- Troubleshooting Guide
- FAQ
The Science: What Ice Cream Actually Is
Ice cream is a frozen foam: tiny ice crystals, fat globules, and air bubbles suspended in a concentrated sugar solution that never fully freezes. Every technique in this guide serves one goal — keeping those ice crystals small. Small crystals read as creamy on the tongue; large ones read as icy and coarse.
Four levers control crystal size. Fat (cream) coats crystals and interrupts their growth. Sugar lowers the freezing point so a portion of the mix stays syrupy and soft. Air, churned in during freezing, lightens the texture. And speed — the faster the mix freezes, the less time crystals have to grow. Remember those four levers and every recipe and every failure will suddenly make sense.
The Standard Ratio
A dependable home base is 2 parts heavy cream to 1 part whole milk, with roughly ¾ cup of sugar per quart of dairy and a pinch of salt. More cream means richer and softer; more milk means lighter and icier. Every recipe below riffs on this frame.
Equipment: Home and Commercial
The Home Kit
You need less than you think. A heavy-bottomed saucepan for cooking custard, a whisk, a fine-mesh strainer, an instant-read thermometer, a freezer-safe storage container with a lid, and — for churned styles — an ice cream machine. Canister machines with a pre-frozen bowl start around $50 and work well if the bowl is frozen solid for 24 hours first. Compressor machines ($200+) freeze on demand and churn back-to-back batches, which matters once you're testing flavors seriously.
For no-churn recipes, swap the machine for a hand mixer and a loaf pan. That's the entire list.
The Commercial Kit
Small-scale commercial production adds three machines: a batch freezer (the workhorse that churns 2 to 12 quarts at a time), a blast freezer or very cold chest freezer for rapid hardening, and a dipping cabinet or display freezer holding a steady serving temperature around 6 to 10°F. Add NSF-rated containers, a dedicated refrigerator for aging bases, and a sanitizer setup, and you have the core of a scoop operation. Used batch freezers are widely available and cut startup costs dramatically — condition of the refrigeration system matters far more than cosmetic wear.
The Three Base Styles
Every ice cream in the world descends from one of three bases, and choosing among them is mostly a question of effort versus payoff.
Custard (French) Base
Egg yolks cooked gently into the dairy create the richest, smoothest, most scoopable ice cream. The yolks' lecithin is a natural emulsifier that keeps fat and water happily married through freezing. This is the base for anyone chasing scoop-shop quality, and the full method is below.
Philadelphia Base
No eggs — just cream, milk, sugar, and flavor. Faster and lighter, with a cleaner, milkier taste that flatters bright fruit flavors. It freezes a bit harder and icier than custard, so it rewards eating within the first week.
No-Churn Base
Whipped cream folded into sweetened condensed milk. The condensed milk contributes pre-dissolved sugar (softness) and the whipping contributes air, so the freezer does the rest with no machine at all. Slightly sweeter and denser than churned styles, and an unbeatable entry point.
Step-by-Step: Classic Custard Ice Cream
This makes about one quart of vanilla custard ice cream — the mother recipe for dozens of flavors.
Ingredients
- 2 cups heavy cream
- 1 cup whole milk
- ¾ cup sugar
- 5 large egg yolks
- Pinch of salt
- 1 to 2 teaspoons vanilla extract, to taste
Step 1: Heat the Dairy
Warm the cream, milk, half the sugar, and the salt in a heavy saucepan over medium heat until steaming — not boiling. Bubbles at the edge of the pan are your cue.
Step 2: Temper the Yolks
Whisk the yolks with the remaining sugar until pale. Then, whisking constantly, drizzle about a cup of the hot dairy into the yolks. This gentle warm-up prevents the yolks from scrambling when they meet the pan.
Step 3: Cook to 170–175°F
Pour the warmed yolk mixture back into the saucepan and cook over medium-low, stirring constantly with a spatula, until the custard reaches 170 to 175°F and coats the back of a spoon. Do not let it boil — 180°F and beyond is scrambled-egg territory.
Step 4: Strain and Chill
Immediately strain the custard through a fine-mesh sieve into a clean bowl to catch any cooked egg bits. Cool it quickly over an ice bath, then refrigerate at least 4 hours — overnight is better. This aging step hydrates the proteins and genuinely improves texture; professional makers never skip it.
Step 5: Flavor the Cold Base
Stir vanilla (or any water-soluble flavoring — details in the flavoring section) into the chilled base. Flavoring after chilling preserves delicate aromatics that long cooking dulls.
Step 6: Churn
Churn according to your machine's instructions until the mix looks like thick soft-serve, usually 20 to 30 minutes. It will not freeze hard in the machine — soft-serve consistency is the finish line.
Step 7: Harden
Transfer to a chilled container, press parchment or plastic against the surface, and freeze at least 4 hours. This "hardening" stage completes the freeze and sets the scoopable texture.
Step-by-Step: No-Churn Ice Cream
The 15-minute path. Makes about 1.5 quarts.
Ingredients and Method
- 2 cups cold heavy cream
- One 14-oz can sweetened condensed milk
- Pinch of salt
- Flavoring to taste
Whip the cream to stiff peaks. Stir your flavoring and salt into the condensed milk, then fold in the whipped cream in three additions, keeping as much air as possible. Freeze in a loaf pan, surface covered, for 6 hours.
Because there's no churn to homogenize things, flavor the condensed milk before folding — it distributes far more evenly. We covered no-churn flavor strategy in depth in flavored ice cream without the churn.
Step-by-Step: Philadelphia-Style Ice Cream
When you want ice cream tonight and don't want to cook custard, Philadelphia style is the answer. No eggs, no thermometer, no straining — just a clean, milky canvas that lets bright fruit flavors shine.
Ingredients
- 2 cups heavy cream
- 1 cup whole milk
- ¾ cup sugar
- Pinch of salt
- Water-soluble flavoring to taste
Method
Whisk everything except the flavoring in a bowl until the sugar fully dissolves — rub a drop between your fingers; if it feels gritty, keep whisking. Warming one cup of the milk to dissolve the sugar, then chilling, speeds this up.
Chill the base thoroughly, stir in your flavoring and any coloring, then churn and harden exactly as in the custard method. Total hands-on time is about ten minutes.
Philadelphia style is the base professionals reach for when they want fruit to taste like fruit. A cooked custard's eggy richness can blur delicate flavors like strawberry and mango; the leaner Philadelphia base lets them ring clear. It's also the natural home for a sherbet-adjacent scoop — increase the milk, decrease the cream, and lean harder on the flavoring.
Flavoring Ice Cream Like a Professional
Here's the problem with flavoring ice cream from whole ingredients: water. Fresh fruit is mostly water, and water in ice cream means ice crystals. Purée half a pound of strawberries into your base and you'll taste the trade-off — diluted flavor and crunchy ice.
Concentrated water-soluble extracts solve both problems at once. They carry intense flavor in drops rather than cups, so the base's carefully balanced fat-sugar-water ratio stays intact. Ice cream is a water-based system, which makes water-soluble extracts the correct tool — they disperse evenly through the mix with a quick stir.

Building a Flavor Menu
Start with the crowd-pleasers from our ice cream flavoring collection: strawberry for the pink classic, mango for a tropical sorbet-style scoop, coconut for piña colada territory, and caramel swirled through a vanilla base. For dessert-inspired flavors, cheesecake and birthday cake batter turn a plain custard into a premium pint, and ube delivers the purple-scoop trend that fills social feeds — see our creamy ube ice cream recipe for a full walkthrough.
Dosing
Concentrates are strong. Start with ⅛ to ¼ teaspoon per quart of base, stir, and taste the cold mix. Two rules of thumb: cold mutes flavor, so the base should taste slightly stronger than you want the finished scoop to be; and you can always add more, but you cannot take it out. Add flavors to the chilled base rather than the hot custard to keep bright top notes intact.
The Sugar-Free Angle
Because extracts carry no meaningful sugar, they're the backbone of keto and low-sugar ice cream — sweeten the base with your preferred substitute and let the extract do the flavor work. Our keto vanilla ice cream recipe shows the full method.
Six Signature Flavors to Build First
Theory is nice; a menu is better. Here are six builds that cover the full range of what extracts can do, each starting from one quart of either base above.
1. Classic Strawberry
Philadelphia base, ¼ teaspoon water-soluble strawberry (adjust to taste), a few drops of natural pink coloring. This is the scoop that proves the concentrate approach: intense berry flavor, zero iciness, pink through and through.
2. Mango Coconut
Philadelphia base made with half coconut milk, flavored with mango extract and a supporting drop of coconut. Tropical, dairy-lighter, and stunning with a golden tint.
3. Salted Caramel Custard
Custard base, caramel extract stirred in after chilling, finished with a heavy pinch of flaky salt at the end of churning. Swirl in a ribbon of thick caramel sauce as you pack the tub if you want bakery-case drama.
4. Birthday Cake
Custard base with birthday cake batter extract, rainbow sprinkles folded in during the last minute of churning. Kids will abandon the packaged stuff forever.
5. Purple Ube
Custard base, ube extract, and a drop or two of natural purple to push the violet. The trend flavor of the decade, and extracts make it achievable without hunting down fresh purple yams.
6. Cheesecake Ripple
Custard base with cheesecake flavoring, layered into the tub with spoonfuls of crushed graham cracker. Tastes like the dessert cart, costs like a Tuesday.
Coloring Ice Cream Naturally
A strawberry ice cream that's barely pink reads as bland before the first bite — color sets expectations. But there's no need for synthetic dyes: water-soluble natural colorings stir into an ice cream base exactly like the flavors do.
From the natural food coloring collection: a few drops of natural pink makes strawberry look like strawberry, super red deepens cherry ripple to soda-fountain red, natural blue creates birthday-party blue moon scoops, and natural purple backs up ube's signature look. Add color to the chilled base a drop at a time until it's slightly more vivid than your target — colors soften a touch as air churns in.

Scaling Up: Commercial-Grade Production
The chemistry doesn't change at scale — the discipline does. If you're moving from hobby batches to selling pints or scoops, these are the adjustments that matter.
Standardize the Base, Vary the Flavor
Nearly every successful small ice cream operation runs one master base and differentiates entirely through flavoring and mix-ins. One base means one aging protocol, one costing sheet, and one set of variables when something goes wrong. Concentrated extracts make this model work: a single white base becomes strawberry, mango, caramel, or birthday cake in the last two minutes of production, and dosing by measured teaspoons per gallon keeps every batch identical — which is exactly what customers mean by "quality."
Batch Workflow
A typical production day: pasteurize or heat the base in the morning (or buy pre-pasteurized mix, which many health departments prefer for small operators), chill fast, age refrigerated, then churn flavor by flavor in the batch freezer — lightest flavors first so colors and strong notes don't carry over. Draw the ice cream at soft-serve consistency into pre-chilled tubs and move it straight to the blast freezer. Speed from batch freezer to hardening is the single biggest texture lever in commercial work.
Understand Overrun
Overrun is the percentage of air churned into the mix, and it's the number that separates product tiers. Cheap supermarket ice cream runs 90 to 100 percent overrun — half of what you're selling is air. Premium pints run 20 to 40 percent: denser, richer, heavier in the hand. A batch freezer gives you direct control here, and a kitchen scale gives you the measurement: weigh a cup of unfrozen base, weigh a cup of finished ice cream, and overrun = (base weight − ice cream weight) ÷ ice cream weight × 100. Pick a target and hit it every batch; density consistency is something customers feel immediately even if they can't name it.
Food Safety and Rules
Dairy products are regulated more tightly than candy — most jurisdictions require a licensed commercial kitchen, and cottage food laws that cover confections usually exclude ice cream. Talk to your local health department before you sell a single scoop. Keep hot custard above 165°F during cooking, chill below 41°F within the window your inspector specifies, and log temperatures from day one; the habit is free and audits love it.
Costing
Concentrates keep flavor cost per pint measured in cents, which is why the margin math on premium ice cream works. Track cost per finished pint (dairy, sugar, flavor, color, packaging) and price retail pints at three to four times that number as a starting point, adjusting for your market.
Troubleshooting Guide
My ice cream is icy and coarse
The classic complaint, with three usual causes: the base wasn't cold enough before churning (chill to 40°F or below), the freeze was too slow (pre-freeze canister bowls a full 24 hours; harden in the coldest part of the freezer), or there's too much water in the mix (watery add-ins like fresh fruit purée — switch to concentrated extracts for flavor without the water).
My ice cream freezes rock hard
Not enough sugar or fat, or your freezer is very cold. Sugar is antifreeze in this system — don't cut it below the recipe without a substitute strategy. Let hard pints temper on the counter for 5 to 10 minutes before scooping.
My custard has lumps or tastes eggy
The custard got too hot. Cook to 170–175°F, stir constantly, and strain immediately. If you catch curdling early, an immersion blender can often rescue the batch before churning.
My ice cream tastes bland after freezing
Cold suppresses flavor perception. Flavor the base to taste slightly too strong at fridge temperature, and add a pinch of salt — it sharpens sweetness and fruit notes remarkably.
The texture is greasy or buttery
Over-churning. Once the mix hits soft-serve consistency, stop — continued churning literally churns butter from the cream. This also shows up when canister bowls are only half-frozen and churn times stretch past 40 minutes.
My mix-ins sank to the bottom
Add solid mix-ins in the last minute of churning when the ice cream is thick enough to suspend them, and chop them small — big frozen chunks turn tooth-breaking hard at 0°F.
Storing and Serving Like a Scoop Shop
Texture is won in the freezer as much as the churn. Store home batches in shallow, wide containers rather than deep tubs — they freeze through faster and temper faster for serving. Press parchment or plastic wrap directly onto the surface before lidding to block frost, and park containers at the back of the freezer where door-swing temperature swings can't reach them.
For serving, temper pints on the counter for five to ten minutes, or thirty seconds of restraint in the microwave at low power if the crowd is impatient. A scoop dipped in warm water glides through even a hard-frozen custard. And if you're plating for guests, chill the bowls — a warm bowl melts the outer millimeter instantly and the whole scoop slides around in soup.
One last professional habit worth stealing: label every batch with flavor and date. Two weeks from now, "mystery beige, probably caramel?" is a less compelling dessert than it sounds.
FAQ
Do I need an ice cream machine to make good ice cream?
No — the no-churn method above produces a scoopable, creamy result with a hand mixer and a loaf pan. A machine buys you lighter texture and the full custard experience, but it's an upgrade, not a prerequisite.
Are oil-soluble or water-soluble flavors better for ice cream?
Water-soluble. Ice cream is a water-based system, and water-soluble extracts disperse evenly through the base with a stir. Save oil-soluble flavors for chocolate work, gummies, and hard candy — the full breakdown is in our water-soluble vs. oil-soluble guide.
How much flavoring extract should I use per quart?
Start with ⅛ to ¼ teaspoon per quart of base, taste cold, and adjust upward in small increments. Concentrations vary by flavor, so your palate outranks any chart.
How long does homemade ice cream keep?
Two to three weeks at peak quality, stored airtight with a layer pressed against the surface to block freezer burn. It stays safe longer, but ice crystals grow with every temperature swing of a frost-free freezer.
Can I make this dairy-free?
Yes — full-fat coconut milk substitutes for the dairy in either churned base, and water-soluble extracts flavor plant bases exactly the same way. Expect a slightly firmer freeze and temper before scooping.
What's the fastest path to selling my ice cream?
Contact your health department first, since ice cream is rarely covered by cottage food laws. Many small makers start by renting time in a licensed commissary kitchen and selling pints at farmers markets or to local cafés while they validate flavors — one standardized base, a tight menu of extract-driven flavors, and honest pricing beat a giant menu every time.